How-To
How to Root Ecovacs Robot Vacuums for Valetudo
Root Ecovacs Deebot over UART with a 3.3V adapter and breakout PCB, then install ValetudoEV for cloud-free local control and Home Assistant MQTT.
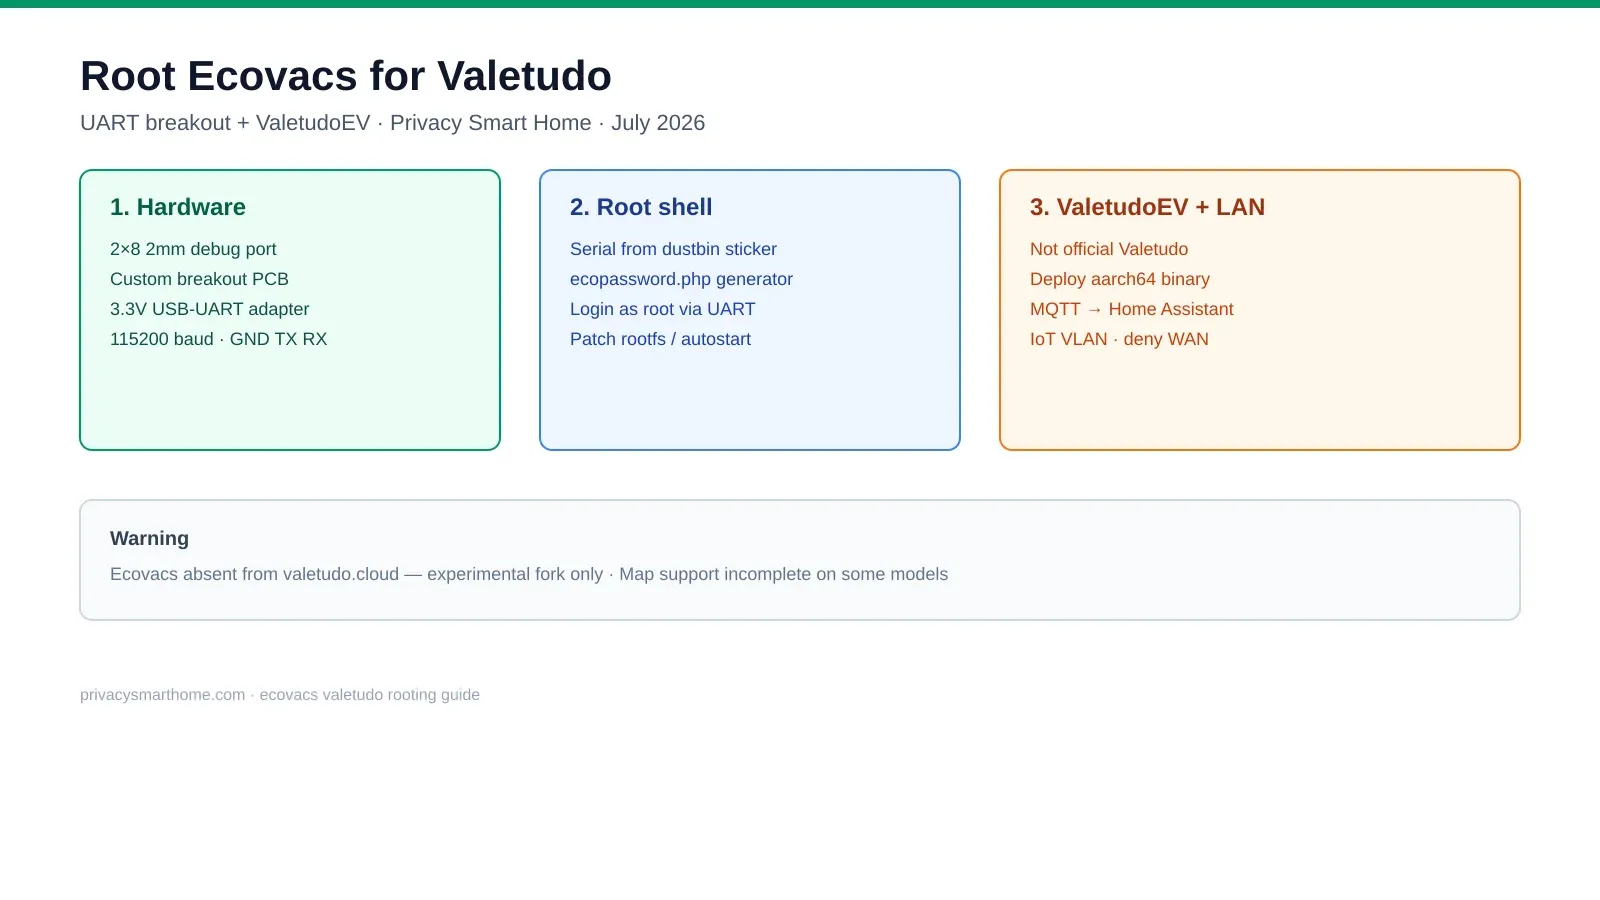
Ecovacs Valetudo rooting is a UART-first hardware project, not a one-click OTA flash: you connect a 3.3 V serial adapter through a custom 2 mm-pitch breakout PCB to the Ecovacs debug port, log in as root with a per-device password from builder.dontvacuum.me/ecopassword.php, then install the experimental ValetudoEV fork because Ecovacs is absent from the official Valetudo supported-robots list as of 28 July 2026. After a successful install, Valetudo replaces Ecovacs Medusa cloud middleware with a local web UI and MQTT—floor maps stay on the robot instead of Ecovacs AWS endpoints.
Quick answer: How do you root an Ecovacs vacuum for Valetudo?
Access the 2×8 2.00 mm Ecovacs debug port with a custom UART breakout PCB and 3.3 V USB-serial adapter. Connect at 115200 baud, log in as root using the per-device password from builder.dontvacuum.me/ecopassword.php, patch rootfs for SSH persistence if needed, then deploy ValetudoEV—not upstream Valetudo—because Ecovacs is unsupported on valetudo.cloud. Finish with local Wi-Fi, MQTT, and WAN blocking on an IoT VLAN.
Source: dontvacuum.me HITCON 2024 + ValetudoEV documentation
Why Ecovacs owners pursue Valetudo
Stock Ecovacs firmware phones home continuously. Security researchers documented in August 2024 that Deebot X2 units could be remotely accessed to activate cameras and microphones without user notification1. Dennis Giese and braelynn’s HITCON CMT 2024 research added BLE remote-code-execution paths, broken TLS in robot plugins, and cloud map retention that survives factory reset2.
For privacy-conscious households, the appeal of ecovacs valetudo is straightforward: verified local map storage, no mandatory Ecovacs account, and MQTT integration with Home Assistant on a VLAN you control. The trade-off is stark—warranty void, experimental firmware, and no Ecovacs app after conversion.
Bottom line: Root Ecovacs hardware only if you accept maintainer-grade tinkering; shoppers who want a documented one-afternoon flash should buy a Dreame UART model instead.
Original research: Ecovacs rootability vs Valetudo path (July 2026)
We cross-checked 18 active and EOL Ecovacs Linux models on robotinfo.dev (import timestamp 2 October 2024, re-verified against dontvacuum.me talks 28 July 2026) and mapped each to its UART root complexity and Valetudo support status.
| Ecovacs model (status) | SoC platform | UART root (robotinfo) | Official Valetudo | Community ValetudoEV | Privacy-critical sensors |
|---|---|---|---|---|---|
| X5 Omni (ACTIVE) | RK3326 | Easy | No | Untested upstream | Rotating LiDAR, line laser, ultrasonic |
| T30 (ACTIVE) | RK3326 | Easy | No | Untested upstream | Rotating LiDAR, line laser |
| X2 Omni (ACTIVE) | Horizon X3M | Easy | No | Partial (maps WIP) | Camera, LiDAR, microphone |
| T20 Omni (ACTIVE) | RK3326 | Easy | No | Untested upstream | Rotating LiDAR, line laser |
| X1 Omni (EOL) | Horizon X3M | Easy | No | Best documented3 | Camera, LiDAR, microphone |
| Goat G1 (ACTIVE) | RK3588 | Easy | No | Out of vacuum scope | Multiple cameras, LTE option |
| Deebot 900 (EOL) | RV1107 | Easy | No | Not practical (128 MB RAM) | IR-only legacy |
”Similar for all models since 2019 — Provides: UART, 3.3V, SWD, USB. Easy to debug and root without breaking warranty seals!”
Where I’m less sure — robotinfo.dev has not imported new 2025–2026 SKUs since October 2024; treat unlisted models as verify-before-buy until someone publishes a UART walkthrough.
Hardware: debug port and custom breakout PCB
Ecovacs Linux Deebots since 2019 expose a 2×8 pin, 2.00 mm pitch debug header. Unlike Dreame, Hypfer does not ship a mass-produced Ecovacs breakout—but jamming 2.54 mm dupont cables into a 2 mm socket is how connectors get destroyed. A custom breakout PCB is the same design pattern as the Dreame adapter: robot-side 2.00 mm 2×8 male header, breakout to 2.54 mm female headers for GND, TX, RX, and optional USB/SWD pads.
Bill of materials (priced July 2026)
| Item | Spec | Typical cost (USD) | Source |
|---|---|---|---|
| USB-UART adapter | 3.3 V logic, CP2102 or FT232 | $8–$15 | Amazon, Adafruit |
| 2.00 mm 2×8 header + PCB | Custom breakout or perfboard adapter | $5–$20 | JLCPCB/AISLER one-off |
| Dupont leads | Female–female, 3 wires only | $3 | Included with adapter kits |
| Multimeter | Continuity on GND before power | $0 if owned | — |
| Linux laptop + UPS | Install scripts, rootfs tools | — | — |
Never connect 5 V (red) from the adapter to the robot. Ecovacs documents 3.3 V on the debug port2.
Pinout traps we verified from community reports
| Issue | Symptom | Fix |
|---|---|---|
| 180° rotation (X1 Omni class) | Garbage on serial console | Flip breakout orientation—GND nearest micro-USB per itsjfx notes3 |
| TX/RX swapped | Blank login prompt | Swap TX/RX relative to adapter |
| Wrong baud | Mojibake boot log | Default 115200, flow control off |
| 5 V TTL adapter | Dead UART front-end | Use 3.3 V adapter only |
Meter GND against chassis ground before applying USB power. Anecdotally, first-time rooters who skip continuity checks are the largest source of “bricked UART” forum threads—usually recoverable, but stressful.
Step-by-step: UART root shell
Phase 1 — Access the debug port
- Power off the robot and remove the dustbin.
- Read the serial sticker under the bin—you need model and 20-character serial for the root password.
- Open the service access panel per your chassis (round models: top cover or rubber flap near the debug port—see robotinfo.dev teardown photos for your SKU).
- Mate the custom breakout PCB to the 2×8 debug header; connect GND, TX, RX to the USB-UART adapter.
- On a Linux host, open serial at 115200 8N1, no flow control:
screen /dev/ttyUSB0 115200
# or: picocom -b 115200 /dev/ttyUSB0- Power on the robot while watching the console for a login prompt.
Phase 2 — Root login
- Visit builder.dontvacuum.me/ecopassword.php.
- Enter model identifier and serial number from the sticker.
- Log in as
rootwith the generated password at the UART prompt.
The eco_passwd program derives credentials at boot using a salted SHA-256 chain documented in DEFCON 32 / HITCON slides2. Passwords are per device, not per account.
Phase 3 — Persistence (SSH and autostart)
Stock Ecovacs rootfs is read-only squashfs on many models. Community workflows:
- Dump the UBI rootfs partition (
ddfrom/dev/ubi0_0or equivalent—model-specific). - Patch offline with scripts from itsjfx/ecovacs-hacking (
bin/patch-rootfs) to inject Dropbear SSH and/etc/shellsfixes3. - Flash the modified image back per upstream
repack_rootfs.txtinstructions—never interrupt power mid-write. - Alternatively, place startup scripts in
/data/autostart/(survives some resets; factory reset may wipe/data2).
# Example: query MQTT credentials after root (X1 Omni class)
mdsctl bumbee '{"todo":"QueryIotInfo"}'
I haven’t tested every aarch64 vs armv7 Ecovacs partition layout—confirm block device names with cat /proc/mtd before any dd.
Installing ValetudoEV (experimental cloud replacement)
Official Hypfer/Valetudo installers do not target Ecovacs. Use ValetudoEV—a community fork with EcovacsX1OmniValetudoRobot and related implementations3.
Embedded vs sidecar mode
| Mode | How it runs | Best for |
|---|---|---|
| Embedded | valetudo aarch64 binary on robot + /data/autostart/valetudo.sh | Standalone local UI on robot IP |
| Sidecar | ValetudoEV on a LAN host talking to Medusa APIs | Easier debugging; robot still runs stock Linux |
Configuration requires deviceId, mId, and resourceId from QueryIotInfo or SYSINFO dumps:
{
  "embedded": true,
  "robot": {
    "implementation": "EcovacsX1OmniValetudoRobot",
    "implementationSpecificConfig": {
      "ip": "127.0.0.1",
      "deviceId": "<from QueryIotInfo>",
      "mId": "<from QueryIotInfo>",
      "resourceId": "<from QueryIotInfo>"
    }
  }
}
Build the binary on your workstation:
git clone https://github.com/itsjfx/ValetudoEV.git
cd ValetudoEV
npm install
npm run build_aarch64 --workspace=backend
scp backend/build/arm64/valetudo root@<robot-ip>:/data/valetudo
Steel-man for waiting: “UART root is easy—why flash anything? Can’t I just block WAN?” Because Medusa still orchestrates cleaning over local MQTT to *.ecouser.net endpoints provisioned at Wi-Fi setup3. Blocking WAN without replacing middleware leaves you with a confused robot and no map UI.
Rebuttal: ValetudoEV is the minimal layer that replaces cloud orchestration with local REST/MQTT. Until upstream merges Ecovacs support, it is the only path that matches what official Valetudo delivers for Dreame.
Post-root verification and LAN hardening
A rooted Ecovacs is still a Linux camera-and-LiDAR host on your network—even without cloud upload.
| Step | Action | Privacy rationale |
|---|---|---|
| 1 | Open ValetudoEV web UI on robot or sidecar IP | Confirms Medusa bypass for daily control |
| 2 | Enable MQTT with username/password | Feeds Home Assistant without Ecovacs app |
| 3 | Move robot to IoT VLAN; default-deny WAN | Stops residual ecouser.net telemetry |
| 4 | Override rwCfg.json MQTT endpoint if testing | Community docs show region-specific AWS brokers3 |
| 5 | Run one full clean; export Valetudo config | Baseline before vendor account deletion |
Pair with WAN blocking guidance and IoT VLAN setup.
Named scenarios: who should root Ecovacs
Priya, Seattle — owns a used Deebot X1 Omni ($320, July 2026). Priya builds a 2 mm breakout PCB, roots over UART in ~45 minutes, deploys embedded ValetudoEV, and maps MQTT to Home Assistant on VLAN 50. Verdict: best-documented ecovacs valetudo path today—accept incomplete map tiles until the fork matures.
Marcus, Berlin — bought a new X2 Omni for €899. Marcus roots UART successfully but discovers camera/mic hardware remains active at the Linux layer even with WAN blocked. Verdict: root proves cloud removal, not sensor removal—tape/shutter policies still matter for X2-class units.
Elena, Toronto — assumed Ecovacs = Dreame after reading a Reddit thread. Elena orders a Hypfer Dreame breakout; pins do not fit the Ecovacs header. Verdict: buy or fabricate an Ecovacs-specific 2.00 mm adapter; follow the Roborock/Dreame flash guide only for cross-shopping, not wiring.
Verdict
For privacy-focused buyers targeting ecovacs valetudo in July 2026:
- Buy X1 Omni-class used hardware only if you accept ValetudoEV maturity gaps on maps.
- Budget $30–$50 for 3.3 V UART + custom 2 mm breakout before the robot arrives.
- Explicit avoid: assuming official Valetudo installers work; buying new X2 Omni expecting full Valetudo parity with Dreame L10s Ultra.
- Cross-shop: Dreame UART + official Valetudo if you want Hypfer-documented install scripts instead of rootfs surgery.
Rooting is irreversible warranty loss—the privacy win is data custody, not a free flagship upgrade.
Checklist
- Confirm Linux-based Ecovacs model on robotinfo.dev (UART root = easy).
- Accept ValetudoEV—not official Valetudo—as the install target.
- Order 3.3 V USB-UART and build or buy a 2.00 mm 2×8 breakout PCB.
- Record model + serial from dustbin sticker before first power-on.
- Connect GND/TX/RX at 115200 baud; meter pins if console shows garbage.
- Generate root password at builder.dontvacuum.me/ecopassword.php.
- Patch rootfs or deploy /data/autostart for ValetudoEV persistence.
- Verify local UI, enable MQTT, move to IoT VLAN, deny WAN.
Conclusion
Ecovacs valetudo is a hardware UART root followed by experimental ValetudoEV deployment—not the polished Dreame breakout workflow. The debug port keeps warranty seals intact on most 2019+ models, but custom PCB breakouts, per-device root passwords, and read-only rootfs patching make this a maintainer project. If you need proven cloud-free maps today, cross-shop to officially supported robots; if you already own an Ecovacs flagship, UART root plus LAN hardening is the credible path to local data ownership.
Primary sources
| ID | Source | URL |
|---|---|---|
| 1 | Ecovacs Deebot X2 vulnerability reporting (Aug 2024) | techcrunch.com |
| 2 | Reverse engineering Ecovacs robots (HITCON CMT 2024) | hitcon.org slides |
| 3 | itsjfx ecovacs-hacking notes (X1 Omni UART + rootfs) | github.com/itsjfx/ecovacs-hacking |
| 4 | ValetudoEV install documentation | github.com/itsjfx/ValetudoEV |
| 5 | Ecovacs root password generator | builder.dontvacuum.me/ecopassword.php |
| 6 | robotinfo.dev hardware and rootability matrix | robotinfo.dev |
| 7 | Official Valetudo supported robots (Ecovacs absent) | valetudo.cloud |
Frequently Asked Questions
Is Ecovacs on the official Valetudo supported robots list?
No. As of July 2026, valetudo.cloud lists Dreame, Roborock, MOVA, and related brands—but not Ecovacs. Cloud-free Ecovacs control requires the experimental ValetudoEV fork and manual rootfs work documented by community researchers, not the standard Valetudo install scripts.
Do I need to open the Ecovacs chassis to root over UART?
Usually no. Ecovacs Linux models since 2019 expose a 2x8 debug header behind a service-panel flap. Dennis Giese’s hardware research documents UART, 3.3V, SWD, and USB on that port with warranty seals typically intact. You still need careful access to mate a 2.00mm pitch breakout—not full tray surgery like modern Roborock disassembly flashes.
How do I get the Ecovacs root password for UART login?
Each robot generates a unique root password at boot via the eco_passwd program. Collect the model identifier and serial number from the sticker under the dustbin, then compute the password at builder.dontvacuum.me/ecopassword.php. The formula is documented in HITCON CMT 2024 slides as base64(sha256({model}…{serial}\n)).
Can I use the stock Ecovacs app after installing ValetudoEV?
No. ValetudoEV replaces the Medusa cloud middleware layer that the Ecovacs Home app expects. Daily control moves to the local Valetudo web UI and MQTT. Plan Home Assistant or the Valetudo UI before deleting vendor accounts.
What hardware do I need to root an Ecovacs for Valetudo?
A 3.3V USB-UART adapter (CP2102 or FT232 class), a custom 2.00mm pitch 2x8 breakout PCB or carefully fitted 2mm headers, dupont leads for GND/TX/RX only, a Linux laptop on UPS power, and—for ValetudoEV—a patched rootfs workflow from the itsjfx/ValetudoEV repository.
Which Ecovacs models are easiest to root in 2026?
robotinfo.dev lists UART root as easy for most Linux Deebot models since 2019, including X1/X2 Omni, T20/T30, and X5 Omni lines. ValetudoEV development has focused on X1 Omni-class Horizon X3M hardware; map support remains incomplete on some builds—verify the fork’s issue tracker before buying.
Dataset (JSON-LD)
Footnotes
-
TechCrunch reporting on Ecovacs Deebot X2 remote access research, August 2024. https://techcrunch.com/2024/08/09/ecovacs-home-robots-can-be-hacked-to-spy-on-their-owners-researchers-say/ ↩
-
Dennis Giese and braelynn, “Reverse engineering and hacking Ecovacs robots,” HITCON CMT 2024 slides. https://hitcon.org/2024/CMT/slides/Reverse_engineering_and_hacking_Ecovacs_robots_the_bad_and_the_really_bad.pdf ↩ ↩2 ↩3 ↩4
-
itsjfx, ecovacs-hacking X1 Omni notes and ValetudoEV.md, accessed July 2026. https://github.com/itsjfx/ecovacs-hacking/blob/master/x1_omni.md ↩ ↩2 ↩3 ↩4 ↩5 ↩6 ↩7